Friday, 31 August 2012

A first birthday.....

The third card is a first birthday.
I used papers which came with a magazine again for this one as I loved the vibrant colours.
I cut squares 2" and patched then onto another 8x8" card after inking the edges.
The photograpgh and frame were cut with a Marianne die, once in place I ran a line of stickles to join them. Jean's message was placed onto a piece if card which I made into a tag with some ribbon.
The birthday greeting was mounted onto the same card which I punched at either end and threaded a ribbon banner through.
 
 
I punched some small retro daises and added candi to the centres.
Fronds were added too.

 
The insert again has a message and photograph which are placed onto the same papers.
 
One more to go....
 
Hope she likes them!

Thursday, 30 August 2012

A wedding.....

Card number two is for their wedding.
An 8x8" card again with paper from MME State of the Heart collection pack.
I added red ribbon and a knot on the side again.
The heart with their names on is a die cut strip which I have trimmed.
The letters are Making Memories rub-ons.
 
 
I punched the hearts with a Stampin' Up punch then layered them.
The lower ones are on 3d foam.
Some have diamante, some glossy accents, the bottom one has a tied gold thread.
 
 
Jean supplied words for the inserts which I have mounted onto the same papers.
As they are private messages I have not shared them.
 
Another one to follow....
 
Thanks for looking :)

Wednesday, 29 August 2012

An Engagement....

A lady I met a while back contacted me to make 4 cards for her, this is the first.
It's her daughter Karen with fiance to celebrate their engagement.
Jean e-mailed the photos over and this is what I made,
 
The card is 8x8" square and has Basic Grey Indie Bloom paper as the background.
The mount for the photo came with a magazine and had lovely words and sentiments on it so I used that and cut around elements to slide the photo under.
 
 
I added some ribbon and a tie to the side.
The letters are from the Basic Grey Indie Bloom collection pack.
I outlined them with a white Signo pen - wow how juicy are they!
Then, once dried added glossy accents.
 
 
I punched some retro daisies and doodled around the edges plus a Martha Stewart butterfly and some fronds.

 
The centre of the large flower is a circle punch, the smaller are candi.
I added some jewels as the butterflies body.
The engagement letters are peel-offs.
 
I hope she likes it - the rest are to follow.
 
TFL
xxx


Monday, 27 August 2012

Card for a Twitcher

Recently I've had a few requests, this the first.
 
It's for a young man who loves birds (feathered variety!).
I used a picture from a bird book that Mum and Dad had and printed it onto photographic paper.
The base card is 8x8" and the papers are MME, I believe - a christmas range, although you wouldn't know it from this!
 
 
I added gold brads to the corners then trimmed around the image which is a juvenile and adult Robin and stuck it down.
I cut several layers and used 3d foam.
The top layer, the wing, I stuck directly to the layer below and just put the foam on the end.

 
The name is my Making Memories rub-ons - what am I going to do when they are gone, I am loving them so much.

 
I finished the card with a birthday message mounted onto a circle and scalloped circle cut with SU punches.
 
Happy Birthday Aiden.
 
Thanks for looking
xxx
 

Sunday, 19 August 2012

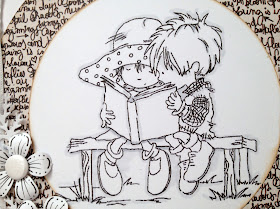
Black and White

Another card I made for our Scrapology Challenge this month was this one.
Not everyone enjoys colouring so I thought I would do one with just a stamped image.


I have used a CWC scalloped 6x6" card.
I cut around the image using a circle cutter and a larger circle of patterned paper - Fancy Pants, It's the little things - which came free with Scrapbook Magazine.
A thin ribbon strip and tie was added to the spine.


I punched 3 small retro daisies and doodled on the with a fine-liner. My Martha Stewart punch was used for the fronds. I added White Candi to the centres and each scallop around the edge of the card.


I used two Copic pens W1 and W3 to lightly shade areas of the image just for definition.

Don't forget to check out the challenge and fab prize on offer for the winner.

Thanks for taking the time to look.

xxx


Friday, 17 August 2012

Happy Birthday Sandra

It was fellow DT member Sandra's birthday last week and this is the card I made for her.
I couldn't add it before as its one of my cards for the Scrapology Challenge - Lily of the Valley
 - so belated birthday wishes to you Sandra :)


I cut down the Lily of the Valley image and coloured it with Copics.
The papers are from Websters to which I added a few blooms and some seam binding.

Hope you had a fab day Sandra!

Check out the Scrapology Blog for details of the challenge and prize.


Wednesday, 15 August 2012

Some Bunny loves you

This months Scrapology card challenge has been set by Lily of the Valley's Bev Rochester.

Here is mine.
The image is called Bunny Flowers.


I used a 6x6" white card and some paper from my collection as a base.
I wrapped some ribbon around the spine and added a bow.
The image is coloured with Copics, the background using a technique taught by Kay Carley.


I mounted the image on a sheet of white card embossed with a plate, then added a Memory Box corner with some pearls and a heart to embellish.


The butterflies were punched from some scraps with a Martha Stewart triple punch.

Why not hop (no pun intended) on over to Scrapology for more details of the challenge and the other DT members cards.


Tuesday, 14 August 2012

Update for Desk Ted

Desk Ted has been very busy lately at his new job so no time to blog, however, he wants to set the record straight. He has not taken up an acting career and in no way is related to the imposter in the new film.
New updates and adventures to follow. Desk Ted appreciates your continued support and sends his love.
Xxx

Monday, 13 August 2012

Celebration - Another catch-up

Last year at Jill's retreat - Cardinal Colours - I joined a card class with
Zoe used Stampin' Up papers Celebration and a stamp set and showed us how to make the following:


First a lovely exploding box which open to reveal...


a birthday cake with candle!
These are the little battery operated ones you can pick up quite cheaply which has
been covered with papers.


An easel card with balloons.


And a candle card which I have tweeked slightly as I didn't have all the bits.


Thanks for a fab class Zoe - sorry it's taken so long to finish and blog!

The kit contained so many papers and card that I continued to make these:


Thanks for looking
xxx

Sunday, 12 August 2012

Christmas in August?

Not sure if I had shared this project with you but I finished it yesterday so added it.
We were taught this a while back at a day retreat with Carolyn from Stampin' Up.


It was made using Stampin' Up products and I added the photographs finally!

The front closes with a ribbon tie....


And opens to reveal...


And then further...


This is the view from the top.


It was fun to make - Thanks Carolyn for the class.

TFL
xxx


Saturday, 11 August 2012

Nail Update

3rd gel manicure, week one. Went for hot pink as it felt summery! Nicola cut quite a bit off the length, I was surprised how fast they had grown.

Monday, 6 August 2012

Magnetic Nail polish

I tried without success to make an appointment to have my 3 week manicure renewed this weekend.
It had grown out a little so I decided to paint over with the Nails Inc magnetic polish until I can get it done.
They look a bit raggety in these pictures but not that bad on my hands!


The effect is really cool, you just paint a thicker second coat and hold the magnet over them for a few seconds.
You can change direction to for different shapes.
Will all be changed on Tuesday evening - wondering which colour to go for now :)


Thursday, 2 August 2012

Scrapology August Challenge - My Girl - N is for netting

This months scraplift was a layout by 2dogs (Toni).
We chose to use Websters pages for our class page, Every Day Poetry - Die Cut, A little bird and Glorious Day.

I traced the cut-out onto the Douglas Fir bazzill then cut about 5mm larger.
Both edges were distressed then mounted onto the Scout bazzill which was gutted to 1".


I cut elements from the patterned papers first so I knew I had the pieces I wanted to use then cut a circle from the yellow paper remnant. I wanted to create a "lace" border so I punched scalloped ovals from the striped papers and added them under the edge.
The Smaller circle and scalloped border were from punches.


I cut and layered the butterflies I had cut out and as one was only partial, placed that one underneath.
The netting was a 6" wide strip which I have stapled either side of the page then tied a knot one side.
I used the excess along with left-over papers to cut flowers with the Tim Holtz Tattered florals die.
These were inked and layered as below then liquid pearls added to the centre.


I added dots of liquid pearls around the edge of the die cut shape for extra definition and created some swirls too.


My title "girl" was cut with the Cricut Art Nouveau cartridge, the letters "My" I wrote onto scraps and cut into rectangles.


These are the papers used, you can see where I have cut the bird cages and other elements from:


This is our sketch and the lovely original by Toni:


Hop over to Scrapology to see the challenge details - still time to enter!

Thanks for looking.

x